WP Content Crawler

Contents

  • 1. Getting Started
  • 2. Quick Start
  • 3. Guides
    • 3.1. Creating site settings to crawl a site
    • 3.2. Saving posts automatically
    • 3.3. Updating posts automatically
    • 3.4. Translating posts automatically
    • 3.5. Spinning posts automatically
    • 3.6. Deleting posts automatically
    • 3.7. Using cookies
    • 3.8. Importing all cookies of a site
    • 3.9. Adding request headers
    • 3.10. Importing request headers from browser
    • 3.11. Increasing speed of tests in site settings page
    • 3.12. Using custom general settings for a site
    • 3.13. Adding category URLs automatically
    • 3.14. Duplicating site settings
    • 3.15. Manually saving posts
    • 3.16. Manually updating posts
    • 3.17. Tracking saved posts
    • 3.18. Getting notified when selectors cannot find a value
    • 3.19. Testing site settings
    • 3.20. Collecting post URLs from multiple pages of a category
    • 3.21. Saving multi-page posts
    • 3.22. Saving list-type posts
    • 3.23. Saving post meta (custom fields)
    • 3.24. Saving taxonomy values
    • 3.25. Creating post categories automatically
    • 3.26. Saving posts as custom post types
    • 3.27. Disabling fixed navigation and tabs in site settings page
    • 3.28. Saving post title
    • 3.29. Saving post excerpt
    • 3.30. Saving post content
    • 3.31. Saving post tags
    • 3.32. Saving post permalink (slug)
    • 3.33. Saving post date
    • 3.34. Saving the featured image of a post
    • 3.35. Saving images in post content
    • 3.36. Saving lazy-loaded images
    • 3.37. Defining custom short codes to use anything in templates
    • 3.38. Saving WooCommerce products
    • 3.39. Saving featured images from category pages
    • 3.40. Defining how posts are marked as duplicate
    • 3.41. Adding/removing things to/from post content
    • 3.42. Adding/removing things to/from post title
    • 3.43. Adding/removing things to/from post excerpt
    • 3.44. Saving posts as draft or pending (defining post status)
    • 3.45. Setting the author of the posts
    • 3.46. Removing the links in post content
    • 3.47. Showing iframes in post content
    • 3.48. Showing scripts in post content
    • 3.49. Creating a gallery of images or files in post content
    • 3.50. Taking notes about site settings
    • 3.51. Changing something in every page of every site
    • 3.52. Removing an HTML element from post content
    • 3.53. Dealing with character encoding problems
    • 3.54. Using proxies
    • 3.55. Adding/removing/changing things in target page
    • 3.56. Limiting maximum tags posts can have
    • 3.57. Setting password to posts
    • 3.58. Setting HTTP User Agent and HTTP Accept values
    • 3.59. Manually adding post URLs
    • 3.60. Deleting post URLs of a site
    • 3.61. Deleting a post when it is not found when recrawling
    • 3.62. Assigning a featured image from media library
      • 3.62.1. Assigning a fallback featured image
    • 3.63. Disabling SSL verification for a site
  • 4. Video Tutorials
  • 5. Site Listing Page
  • 6. Site Settings Page
  • 7. General Settings Page
  • 8. Tester Page
  • 9. Dashboard Page
  • 10. Tools Page
  • 11. License Settings Page
  • 12. Common Options
  • 13. Permissions
  • 14. Frequently Asked Questions
  • 15. Troubleshooting
  • 16. Changelog
WP Content Crawler
  • 3. Guides
  • 3.62. Assigning a featured image from media library

3.62. Assigning a featured image from media library

You can assign an image that already exists in the media library of WordPress as the featured image of the post. To do this, follow the steps below:

  1. Go to Site Settings Page and activate Filters Tab
  2. Add a new Filter to Post data filters setting
  3. Click to Add action command button of the filter and configure the new action command as follows:
    Subject:Post
    Property:Value
    Command:Set featured image
    Featured image IDs:
     Add the ID of the image you want to set as the featured image. You can select the image by clicking to button, if you do not know the ID.
  4. Save the site settings (See: Saving The Settings)

Important

If a featured image is found via Featured Image Selectors setting, and a featured image is assigned via Set featured image command, the image assigned via the command is used.

The following figure shows the filter that is described above.

../_images/assigning-featured-image-from-media-gallery.png

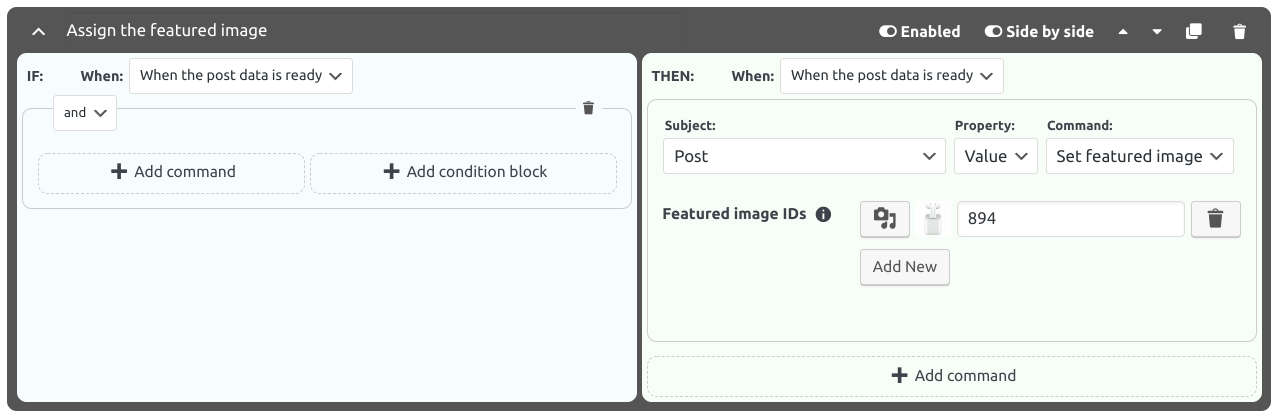
Fig. 3.2 The filter that always assigns the specified featured image to the post

3.62.1. Assigning a fallback featured image

To assign a featured image when a featured image is not found in the target site, follow the steps below.

  1. Go to Site Settings Page and activate Filters Tab

  2. Add a new Filter to Post data filters setting

  3. Click to Add condition command button of the filter and configure the new condition command like below. This defines a condition that will be true if there is no featured image in the target page’s source code.

    Subject:Element
    Property:Value
    Command:Does not exist
    Selectors:Define the CSS selectors that find the available featured images in the target page’s source code. This CSS selector will probably be the same as the CSS selector defined in Featured Image Selectors setting.
  4. Click to Add action command button of the filter and configure the new action command as follows:

    Subject:Post
    Property:Value
    Command:Set featured image
    Featured image IDs:
     Add the ID of the image you want to set as the featured image. You can select the image by clicking to button, if you do not know the ID.
  5. Save the site settings (See: Saving The Settings)

Note

You can also define other conditions. For example, you can check if the title contains one or more specific words and, if so, assign an image that is related to those words.

The following figure shows the filter that is described above.

../_images/assigning-fallback-featured-image.png

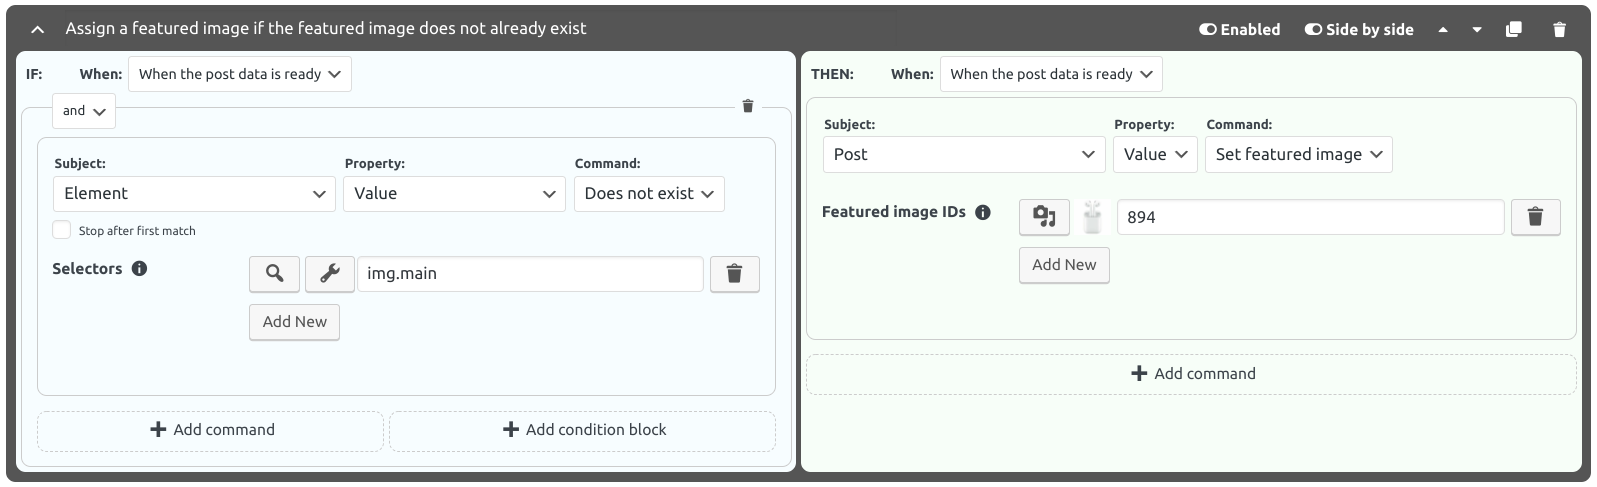
Fig. 3.3 The filter that assigns a fallback featured image to the post

Previous Next

© Copyright 2024, WP Content Crawler. Last updated on 07 September 2024 05:49 UTC +0000.

Other Versions v: 1.12
Branches
1.10
1.11
1.12
1.13
1.14
1.15
1.9
master